


Control Resonant Tips for Your First Week in Broken Manhattan
Remedy’s big sequel has been out for a few days now, and honestly? The opening hours can feel rough. Dylan Faden gets yanked out of a seven-year coma by his sister Jesse, who then vanishes and leaves a leaderless FBC leaning on the guy who once killed hundreds of its staff. Then the game hands him a shapeshifting weapon and drops him into a Manhattan that’s folding in on itself. Enemies hit hard. Menus stack up. And the tutorial explains maybe half of what you actually need.
So here’s what I found after going through launch-week guides, Steam chatter and the first wave of community builds. These Control Resonant tips focus on the stuff that changes your run – not just “dodge more” (though, yeah, dodge more).
A little context first. The game landed with an 84 on Metacritic, and Destructoid gave it a nine out of ten. On Steam, it sits at Very Positive, with 89% of just over 2,100 user reviews in the green. Not everyone’s sold, though. CGMagazine scored it 7.5, calling the gameplay repetitive and the powers underwhelming. That split matters. A lot of “the combat feels bad” takes come from players fighting the game’s systems instead of working with them.
Wait, Dylan Isn’t Jesse – So Stop Playing Like Her?
Here’s the first gentle slap. If your brain still runs on the Service Weapon, your instincts are wrong now. Dylan is a close-range brawler. Hanging back and chucking desks like it’s 2019? You’ll get folded.
There’s also no parry system – no parry window, no perfect block. Dylan’s defense comes from dodging, repositioning and movement abilities. Sekiro veterans, I see you twitching. Let it go.
The good news? You have unlimited stamina, so there’s no reason not to dodge constantly. And the XboxAchievements crew, who put 60-plus hours in, found a neat trick. Fighting in the air makes sideways swipes useless against you, leaving only overhead strikes and projectiles as threats. They also dropped flying Hiss Elevated fast but ignored ground-level Hiss Guards entirely, since those just respawn anyway. Air superiority, basically.
Then there’s Falter. Think of it like a pressure gauge on a kettle. Land enough hits in a short window and the enemy Falters, which stuns them and opens them up for an Execution. Executions grant Dominance, a brief melee damage boost that helps you chew through the next target. So the loop is simple: pressure, Falter, execute, move. Tunnel-visioning one Hiss while three more line up behind you? That’s how most early deaths happen.
The Numbers That Actually Matter
This is where things get a little weird for an RPG. You don’t level Dylan the classic way – zones level up, and your strength comes from a pile of separate stats. Every enemy shows a level next to its health bar, and if it turns red and becomes a skull icon, you’re probably walking into a death loop. You can check Dylan’s current numbers under Stats & Effects in the loadout menu.
| Stat or Resource | What It Does | How You Get More |
|---|---|---|
| Build Power | Overall strength of your equipped forms, talents and core upgrades | Upgrade Aberrant trees and pick up talents |
| Aberrant Strength | Weapon damage multiplier | Any Aberrant upgrade node, even on unequipped forms |
| Ability Strength | Damage and potency of combat abilities | Each new ability boosts the others too |
| Source | Main currency for upgrades and vendors | Combat, side activities, better drops each Cycle |
| Living Shards | New forms, Combo Finishers, final tree nodes | Quests, Faults, bosses, vendors |
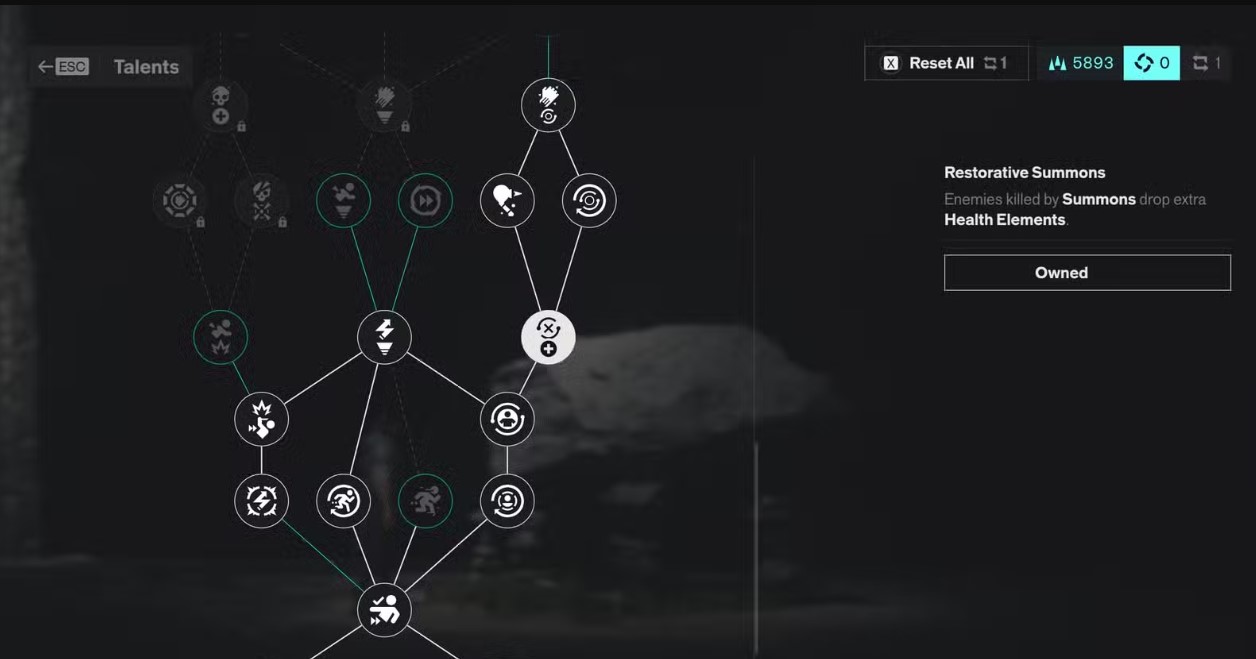
| Talent Points | Spent on the Talent tree | Leveling up zones |
| Reset Items | Respec abilities and upgrades | Vendors |
Now, the kicker – and the one most players miss. Upgrading Aberrant forms you never equip still raises your Aberrant Strength. Forbes’ Paul Tassi explained that opening a brand-new upgrade tree with its first node gives 5 power, while each node after that adds 1. So sprinkling cheap first nodes across every tree is a sneaky, fast damage bump. Weird? Sure. Effective? Very. He also warned that waiting too long to upgrade means you’ll fall behind in power, sometimes badly.
Picking Your Aberrant Without Regret
Early on, the game asks you to lock in a Primary Form. And that pick sticks around for a while. Switching to any other form costs Living Shards, which are hard to come by, so you’ll live with your first decision for some time. Worth a minute of thought, then.
Primary Forms, Secondary Forms and the Great Strike Debate
| Form | Slot | Shape | What It’s Good At |
|---|---|---|---|
| Strike | Primary | Dual blades | Fast attacks, 30% base crit chance |
| Glaive | Primary | Wide-arc weapon | Reach, crowd control, pushing enemies back |
| Cleave | Primary | Axe | Bonus damage from behind, launching enemies |
| Crush | Secondary | Heavy hammer | Big Falter, knockdowns, bonus vs airborne foes |
| Extend | Secondary | Three-part nunchaku | Long range, hitting several enemies |
| Drill | Secondary | Chargeable drill | Quick multi-hits, but short range |
Most guides land on Strike. KeenGamer calls it the best Primary for a first run because it attacks faster than Glaive or Cleave, starts with a 30% crit chance and never traps you in slow animations. Their go-to pairing is Strike plus Crush, since the hammer builds Falter much faster than the alternatives.
But not everyone agrees – and that’s fair. VGTimes argues for Glaive, since its wide radius hits several enemies at once, and most fights pair one tough enemy with a pack of weaker ones. So who’s right? Kinda both. Strike is the better teacher; Glaive is the better crowd tool. New to action RPGs? Go Strike. Got Devil May Cry muscle memory and love herding groups? Glaive won’t let you down.
One gripe worth knowing going in. GameWatcher pointed out there’s no fluid form-swapping mid-combo, though you can change forms freely outside of combat. Set up before big fights, not during.
And a quick reality check on secondaries. Tassi found Drill and the whip-style Extend pretty situational compared to the Crush hammer, but still recommends upgrading their trees for the power boost. Every node counts, remember.
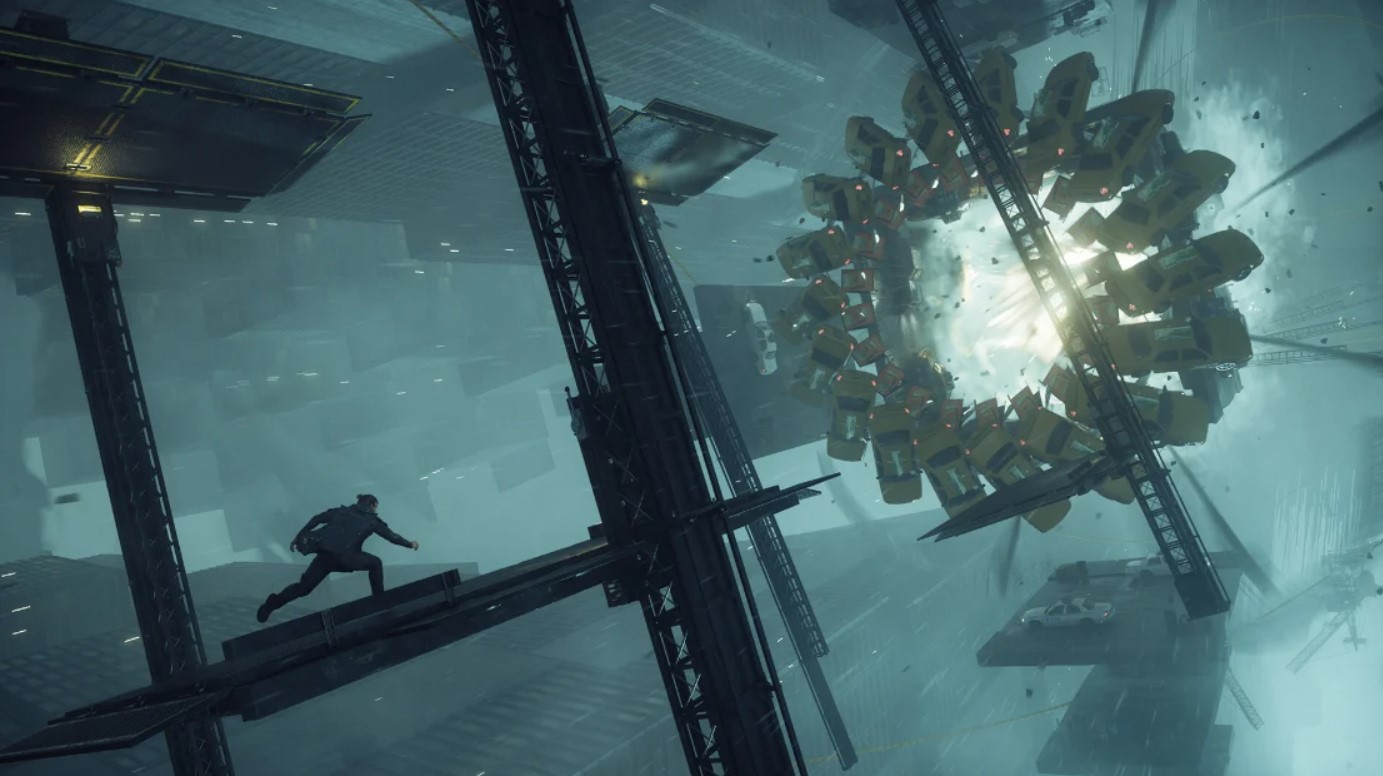
Control Resonant Tips for Spending Living Shards
Living Shards are the premium currency, and here’s the bad news: you can’t farm them. There’s a fixed supply per playthrough, coming from main and side quests, Faults, Resonant boss rewards, and vendors who charge 4,000 Source each. Vendors seem to stock one by default, with another showing up once you raise that zone’s rank.
So spend like someone who knows the paycheck is fixed:
- Buy the first vendor shard in every zone early. 4,000 Source stings at first, but it adds up to real options.
- Only buy a second form if your first one truly isn’t clicking. Don’t abandon a form just because enemies feel spongy – the problem might be your build, not the weapon.
- Combo Finishers come next. They become available once Aberrant Strength reaches 15.
- Save final tree nodes for last. Those capstone upgrades also eat Living Shards.
- Before any huge late-game fight, check the Gap. Unspent shards don’t help anybody.
And if you finish and want more? New Game+ hands out a fresh stash from story missions and Faults.
Boss Timing Is the Real Difficulty Slider
If I had to stick one of these Control Resonant tips on your fridge, it’d be this one. Resonants are the big bosses, one per region, six in total – and while you’ll need to kill them all eventually, you decide when. Only the Artist is locked to a fixed story point; it closes out the opening and can’t be skipped or delayed.
What Actually Happens When a Resonant Drops
Here’s the part that trips people up. Beating a Resonant starts a new Resonant Cycle: most encounters respawn with tougher enemies and new types, World Feats refresh in every zone, and drops get better in quality and quantity. It’s like a mini New Game+ that happens mid-run.
So killing bosses makes you stronger and makes the world meaner – at the same time. Sounds like a contradiction, right? It’s really just pacing. If things feel too easy, go hunt a boss; if you’re still struggling, there’s no harm in holding off and leveling a bit more. Treat every boss as a chapter ending. Wrap up what you want under the current Cycle, then pull the trigger.
Regret it? There’s an escape hatch. Loading an autosave from before the fight puts Manhattan back in its previous Cycle, but you’ll also lose the ability you earned from that boss.
The Ability Picks Worth Fighting For
Each boss hands you a menu, not a gift. The Artist offers three combat abilities, while the Dancer, Deserter, Collective and Physicist each make you pick between two.
Here’s where the community consensus has settled so far:
- Artist (Shield, Barrage or Volatile Anomaly): GamesRadar rates Shield highest, especially with the talent that lets you Detonate it – it drains power but does serious Falter when you dash into enemies.
- Dancer (Ground Slam or Push): Pretty even overall – Ground Slam hits harder, Push is simpler.
- Deserter (Ignite or Inferno): Split vote. GamesRadar calls Ignite the clear winner since it adds Burn and Falter to every weapon hit. Tassi, on the other hand, opened with Inferno in nearly every fight for 90% of his run. Weapon-heavy players, grab Ignite. Want a self-contained fire button? Inferno.
- Collective (Spore Burst or Growth): Nearly unanimous – Spore Burst. Tassi says its Infected status lasts much longer than burn and can chew through most normal enemies’ health even if you walk away.
- Physicist (Spike or Astral Rebuke): Astral Rebuke is the easier one-button pick, but it only works on grounded foes.
Now for the combo everyone’s talking about. When Infected and Burn are both maxed on a single target, they react and explode for massive damage – infect with Spore Burst, close in, and hit with Ignited weapons until they pop. Bonus tip on order: fire from Ignite and Inferno is the best answer to the Mold enemies waiting in the Park, so the Deserter before the Collective makes a ton of sense.
Messed up a pick? Head back to the Gap and interact with the mural on your left as you enter; one Reset Item lets you redo every power choice at once. And later on, finishing the “Pope’s Research” side quest after the main story gives you a Resonant Combat Token for one extra power from a previous choice.
Getting Around a City That Won’t Sit Still
Combat’s only half the fight. The other half is the map itself – a bent, stacked Manhattan that acts more like a metroidvania than a GTA-style sandbox.
Grab Reach Before the Story Tells You To
This one’s huge. Tassi calls Reach, a grappling-style traversal power, the most important skill in the game – and the story won’t point you to it until you hit a dead end, even though you can grab it earlier. It comes from completing the Fault inside the Subway in the Evacuation Zone.
The other traversal powers come the same way. The opening Fault leaves you with Rush and Elevate, the Incursion Fault gives Shift, and the Subway Fault gives Reach. If the story stalls, check whether you’ve skipped a Fault. And don’t stress over areas you can’t reach early – later abilities let you come back.
Control Resonant Tips for Reading the Map
The map looks confusing at first, and that’s kinda on purpose. Tassi noticed that hard-to-spot breaks in the map lines aren’t art-style quirks – they tell you how to route around dead ends, often leading you through a locked door you can open for next time. Follow the unbroken lines. It sounds tiny. It saves hours.
Also, whole zones can slip past you. He nearly finished the game before realizing he’d never visited the Park, a mold-covered area in the top-right corner of the map that the main story never sends you to. You reach it through a gate in the northeast of the Central zone. And yes, you’ll have to eat four types of Mold to get to that boss. Very Control. Very Remedy.
Zones Level Up, Dylan Doesn’t
Side content isn’t filler here – it’s your XP bar. World Feats, like beating a miniboss or defending an FBC asset, earn Zone XP, and each zone level brings rewards such as bonus Source, Health Elements, new side missions or outfits. Zone leveling is also where your skill points come from, and the marked public events around the map give far more XP than just clearing enemies.
Two freebies people keep walking past. Every vendor truck has a health upgrade sitting right next to it. Power Upgrade Points work on a three-count, so grabbing two out of three hasn’t boosted anything yet.
Before you kill your next Resonant, run through this quick checklist:
- Match or beat enemy levels in the zones you’ll revisit – skulls mean stop.
- Grab the health upgrade by every vendor truck you’ve found.
- Push zone levels toward perks like Vendor Level 2 and Source Boost.
- Lock in your build at the Gap. Changing abilities, talents and weapon upgrades later costs Reset Items.
- Finish any side story you’d rather play at the current difficulty.
On talents, one easy call: GamingBible suggests pouring points into Falter and Dominance boosts. They feed the core loop, so they never feel wasted.
Assist Mode Is a Tuning Knob, Not a Cheat Code
Let me explain why this matters more than usual. There’s no Easy, Normal or Hard here. You load a save, then go to Options, Gameplay, Assist Mode and turn it on. It’s tied to that save slot only.
The twist this time? Remedy says the sliders now work in both directions – you can shrink the Perfect Dodge Window, raise enemy aggression and crank incoming damage for a nastier run. Their stance is simple: they’d rather you tweak the rules than quit. Respect.
Presets and Sliders Worth Touching
There are presets like Field Agent, the lowest-stress option for story fans, and Strategist, which demands precise dodges and timing. And none of it touches trophies or achievements.
If you’d rather fix one pain point than flatten the whole game, try this. AllThingsHow suggests setting Outgoing Damage somewhere between 150 and 250 to shorten fights, then dialing it back as Dylan grows, plus nudging Enemy Projectile Speed into the 80s for ranged-heavy encounters. A Perfect Dodge Window around 150 helps a lot against Resonants and other heavy hitters. Change the thing that’s hurting you. Leave the rest.
The 1.3.3 Hotfix and Why Your Early Game Feels Different
If you read reviews and braced for spongy enemies, good news. Remedy shipped hotfix 1.3.3 at launch because enemy health felt too high, Falter took too many hits, and early Dylan wasn’t powerful enough – “even if the man just woke up from a coma,” as the studio joked. It cut base health and Falter requirements for most enemies plus the Dancer and Deserter bosses, raised the caps on Aberrant and Ability Strength, permanently lowered respec costs, and stocked vendors with more Reset Items.
One catch for PC folks. The update required a full re-download on PC. Annoying, sure, but better than grinding through tanky Hiss at launch.
FAQ
Is Control Resonant Still Hard After the Launch Patch?
It’s friendlier now. Hotfix 1.3.3 lowered enemy health and Falter thresholds, and Assist Mode covers the rest.
Does Assist Mode Disable Trophies or Achievements?
No. Every setting can be changed anytime without affecting trophies or achievements.
Which Aberrant Form Should I Pick First?
Strike for most players. Glaive if you prefer handling crowds and don’t mind a slower learning curve.
Can I Farm Living Shards?
Nope – the supply is finite per playthrough. Buy vendor stock and finish side quests.
Can I Redo My Ability Choices?
Yes. Hit the mural in the Gap and spend one Reset Item. After the hotfix, it’s cheaper too.
What Changes After I Beat a Resonant?
The world enters a new Cycle: tougher enemies, fresh World Feats and better drops everywhere.
Is There a Free Outfit Right Now?
Watching Control Resonant on Twitch for 4 hours by October 13, 2026 earns Dylan’s Sierra outfit.
So, Ready to Clock Back In?
Look, Control Resonant asks you to unlearn a lot. No parry, no hanging back, no classic XP bar. But once the loop clicks – pressure, Falter, execute, dodge, repeat – Dylan starts feeling less like a coma patient and more like a walking paranatural wrecking ball. Grab Reach early. Spread cheap upgrades across every form. Hold boss kills until you’re ready for the next Cycle. And don’t feel weird about touching Assist Mode.
Waiting on a boxed copy? Physical editions are due October 15. Mac players, hang tight – that version is still slated for later in 2026. Either way, the Hiss aren’t going anywhere.
A strange city stays a little less strange when players swap notes, so if this guide saved you a Living Shard or a rage-quit, pass it along on your socials and pin it to your bookmarks for your next Resonant Cycle. Every share helps a small crew keep digging through the weird stuff so you don’t have to. And if you’ve got a creative idea or a commercial project in mind, the T-Minus team is always open to a direct message.